WhatsApp chat WooCommerce functionality has become a must-have for modern online stores. Customers expect fast answers before they make a purchase—and nothing’s faster than tapping a WhatsApp button directly from a product page.
In this step-by-step guide, you’ll learn how to add WhatsApp chat WooCommerce buttons using two proven methods:
- Manually, with a bit of HTML (no plugin required)
- Using the Chat Help plugin, perfect for beginners and WooCommerce store owners
Whether you’re a developer looking for control, or a store owner who wants quick setup, this guide has you covered. Let’s start with why adding WhatsApp chat to product pages is such a smart move.
Table of Contents
Why Add WhatsApp Chat to WooCommerce Product Pages?
Adding WhatsApp chat WooCommerce integration directly to your product pages gives customers a frictionless way to ask questions and make buying decisions faster.
Here’s why you should consider adding it:
1. Boost Conversions
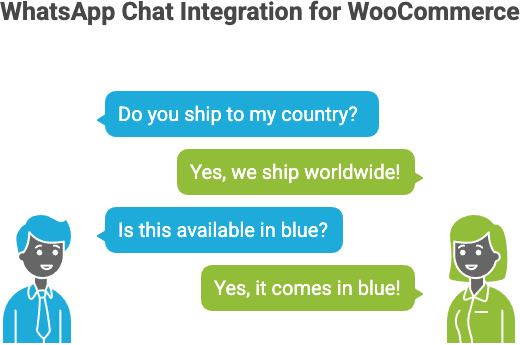
Live chat helps resolve doubts in real-time. A simple “Do you ship to my country?” or “Is this available in blue?” can turn hesitation into a sale.
2. Build Instant Trust
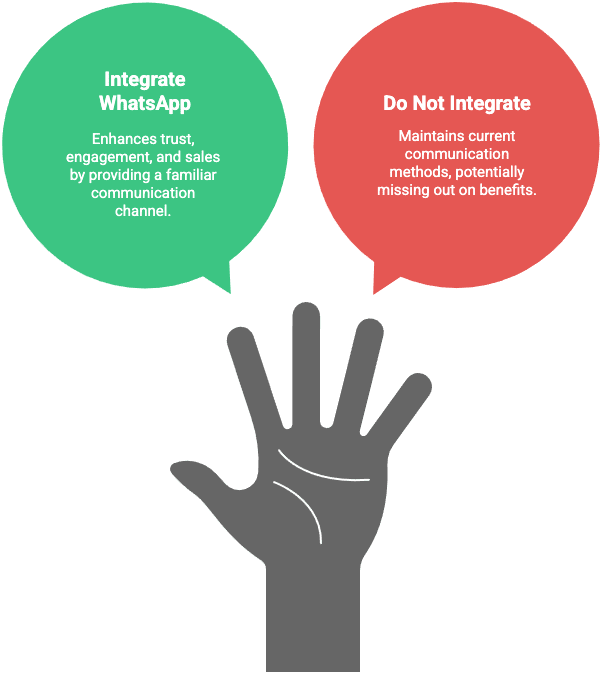
WhatsApp is familiar. When users see it, they know they’ll reach a real person—not a slow contact form or support ticket.
3. Reduce Cart Abandonment
Pre-sale questions left unanswered often result in abandoned checkouts. A WhatsApp chat option helps close the gap.
4. Improve Mobile Experience
Since WhatsApp is already on most customers’ phones, they can contact you in one tap—without needing to switch apps or wait.

Method 1: Manual WhatsApp Chat Button
If you’re looking to keep your store lightweight and avoid adding another plugin, you can easily create a WhatsApp chat WooCommerce button using basic HTML. This method gives you full control over placement and styling—ideal for developers or anyone comfortable editing theme files.
Step 1: Generate Your WhatsApp Click-to-Chat Link
WhatsApp offers a click-to-chat feature that lets users open a chat with you instantly.
Format:
https://wa.me/<your-number>?text=<your-encoded-message>Example:
https://wa.me/14151234567?text=Hi!%20I%20have%20a%20question%20about%20this%20product.Use a URL encoder to encode spaces and symbols in your message.
Step 2: Customize Message with Dynamic Product Info
If you want your message to reference the product name, use WooCommerce’s dynamic PHP like this:
$product = wc_get_product( get_the_ID() );
$product_name = $product->get_name();
Then pass it into your WhatsApp link (in a template file like single-product.php):
<a href="https://wa.me/14151234567?text=Hi! I'm interested in <?php echo urlencode($product_name); ?>" target="_blank">
  Chat on WhatsApp
</a>
This makes each button specific to the product being viewed.
Step 3: Add the Button Using a WooCommerce Hook
The easiest place to add a WhatsApp chat button is right below the “Add to Cart” button.
Paste this into your functions.php file or a custom plugin:
add_action( 'woocommerce_after_add_to_cart_button', 'custom_whatsapp_chat_button' );
function custom_whatsapp_chat_button() {
    global $product;
    $product_name = $product->get_name();
    $link = 'https://wa.me/14151234567?text=' . urlencode("Hi! I'm interested in " . $product_name);
    echo '<a href="' . esc_url($link) . '" class="button whatsapp-chat" target="_blank">Chat on WhatsApp</a>';
}
Step 4: Style Your Button with CSS
Here’s a basic example to match WooCommerce buttons:
.whatsapp-chat {
  display: inline-block;
  margin-top: 10px;
  background-color: #25d366;
  color: white;
  padding: 10px 20px;
  border-radius: 4px;
  text-decoration: none;
}
.whatsapp-chat:hover {
  background-color: #1ebe5b;
}
Tip: Add this CSS to Customizer → Additional CSS or your theme’s stylesheet.
Step 5: Test on Desktop & Mobile
Make sure the button:
- Opens WhatsApp Web on desktop
- Opens the WhatsApp app on mobile
- Pre-fills the correct product name in the message
If this feels too technical or you want more visual control, keep reading. The Chat Help plugin offers an easier and more flexible solution, with WooCommerce integration built in.
Method 2: Add WhatsApp Chat Using Chat Help Plugin
If you prefer a faster, code-free setup—or want extra features like WooCommerce integration, group invite links, and floating chat bubbles—then the Chat Help plugin is the best way to add WhatsApp chat WooCommerce functionality to your store.
No PHP editing. No shortcodes to remember. Just install, configure, and start chatting.
Step 1: Install and Activate the Plugin
- Go to your WordPress dashboard
- Navigate to Plugins → Add New
- Search for Chat Help
- Click Install Now, then Activate
You’ll find Chat Help settings under the Settings or its own menu in your dashboard sidebar.
Step 2: Configure WhatsApp Chat Settings
Once activated:
- Enter your WhatsApp or WhatsApp Business number in international format (e.g.,
+14151234567) - Add a pre-filled message like: “Hi! I have a question about this product.”
- Customize the chat bubble:
- Button color, icon, position (bottom-right, bottom-left, etc.)
- Text label
- Visibility on desktop/mobile
Step 3: Enable WooCommerce Integration
Chat Help lets you display WhatsApp buttons on:
- ✅ Single product pages
- ✅ Product loop views (like category and shop pages)
You’ll find WooCommerce-specific settings inside the plugin dashboard. Just toggle on the options you want—no coding required.
Step 4: Use Dynamic Product Info in Messages
For better personalization, you can include product-specific data in pre-filled messages.
Example:
Hi! I’m interested in the product "{productName}" I saw on your site.
The plugin will automatically replace [Product Name] with the correct product title, making the conversation more seamless and context-aware.
Step 5: Customize Button Styles & Placement
Within the plugin interface, you can:
- Change button size, shape, and alignment
- Choose bubble vs inline styles
- Set display rules (only show on product pages, hide on cart/checkout)
This makes it perfect for non-technical users who want professional results.
Why Choose Chat Help Plugin for WooCommerce?
| Feature | Manual Method | Chat Help Plugin |
|---|---|---|
| Code-Free Setup | ❌ | ✅ |
| WooCommerce Integration | ⚠️ Requires PHP | ✅ Built-in toggle |
| Group Invite Links | ❌ | ✅ |
| Pre-Filled Messages | ✅ | ✅ (More flexible) |
| Design Customization | Limited | ✅ Full visual controls |
| Elementor & Gutenberg Compatible | Manual Only | ✅ Native support |
Style and Position the Button
Once your WhatsApp chat WooCommerce button is working, the next step is making it look and feel like a natural part of your store. Whether you want a subtle inline button or an eye-catching floating bubble, here’s how to customize it.
A. Styling Options with Chat Help Plugin (No Code)
Chat Help includes a built-in design panel that lets you adjust:
- Button shape: Rounded, square, or circle
- Size: Small, medium, large
- Color: Match your brand’s color palette
- Position: Fixed (floating) or inline
- Visibility: Desktop only, mobile only, or both
All changes are previewed live in the dashboard—so you can fine-tune appearance without touching CSS.
B. Floating Chat Bubble Example
Want a floating WhatsApp bubble in the bottom-right corner of every product page?
With Chat Help, just:
- Enable floating bubble option in settings
- Choose bottom right or bottom left
- Customize the label/icon to match your brand
💡 Add image alt text: Be sure to set your chat icon’s alt attribute to something SEO-friendly like: alt="WhatsApp chat WooCommerce button"
C. Styling the Manual Button with CSS
If you’re using the manual method, you can fully control the button’s look with custom CSS. Here’s a quick example:
.whatsapp-chat {
  background-color: #25D366;
  color: #fff;
  padding: 12px 24px;
  border-radius: 6px;
  text-align: center;
  display: inline-block;
  font-weight: bold;
  margin-top: 10px;
  text-decoration: none;
}
.whatsapp-chat:hover {
  background-color: #1ebe5b;
}
You can also float the button using:
.whatsapp-float {
  position: fixed;
  bottom: 20px;
  right: 20px;
  z-index: 999;
}
Wrap your anchor tag inside a <div class="whatsapp-float">...</div> to keep it always visible.
Tips for Better Design Integration
- Use consistent padding and fonts to match WooCommerce buttons
- Keep contrast high (green on white or white on green)
- Avoid clutter: show the chat only where it adds value (product pages, not checkout)
- Test mobile layout to make sure it doesn’t overlap important elements
Pre-Fill Product Info in Messages
One of the most powerful things you can do with WhatsApp chat WooCommerce integration is personalize the message that gets sent when a customer clicks the button.
By automatically including the product name, SKU, or price, you make it easier for both the customer and your team to stay on the same page.
Using Dynamic Tags with Chat Help Plugin
The Chat Help plugin supports dynamic message templates using shortcodes or smart tags (depending on the version you’re using).
Example pre-filled message: Hi! I’m interested in {ProductName}. Can you tell me more about it?
If supported in your plugin version, [Product Name] will automatically be replaced by the WooCommerce product title on that page.
Check the plugin’s documentation for available variables like:
{ProductName}{ProductURL}{ProductSKU}
You can enter these tags in the message template field in the plugin settings.
Manual Method: Insert Product Info via PHP
If you’re using the manual code method, you can dynamically generate the WhatsApp message using PHP:
add_action( 'woocommerce_after_add_to_cart_button', 'custom_whatsapp_chat_button' );
function custom_whatsapp_chat_button() {
    global $product;
    $product_name = $product->get_name();
    $link = 'https://wa.me/14151234567?text=' . urlencode("Hi! I'm interested in " . $product_name);
    echo '<a href="' . esc_url($link) . '" class="button whatsapp-chat" target="_blank">Chat on WhatsApp</a>';
}
This ensures every product page sends a unique, personalized message to your WhatsApp inbox.
Why Personalized Messages Matter
- Saves the customer time: No need to type what they’re interested in
- Reduces confusion for your support or sales team
- Makes the interaction feel customized and professional
- Increases the chance of a sale because the buyer already feels heard
Final Thoughts
Adding WhatsApp chat WooCommerce functionality to your product pages is one of the simplest, highest-impact upgrades you can make to your online store.
Whether you’re a developer who prefers the manual method or a store owner looking for a no-code solution with built-in WooCommerce support, you now have two powerful ways to make it happen:
Option 1: Manual Method
- Lightweight, flexible
- Ideal for developers
- Can include dynamic product info using PHP
- Requires theme file edits and styling with CSS
Option 2: Chat Help Plugin
- Beginner-friendly and plugin-based
- Drag-and-drop customization
- Works with Elementor, Gutenberg, and any theme
- Includes WooCommerce integration, shortcode support, and group links
- Takes just minutes to set up
Whichever path you choose, you’re giving your customers what they want: a fast, personal, and familiar way to reach you directly from your product pages. And that’s a win for both trust and conversions.
Can I add WhatsApp chat to WooCommerce without a plugin?
Yes! You can manually add a WhatsApp chat WooCommerce button using HTML and PHP. By placing a click-to-chat link inside a WooCommerce hook, you can create custom buttons that appear on product pages—without installing any plugin.
What is the best plugin to add WhatsApp chat to WooCommerce?
The Chat Help plugin is a top choice for WooCommerce users. It supports floating chat bubbles, WooCommerce product page integration, shortcode placement, and even WhatsApp group links—all without requiring code.
Will WhatsApp chat buttons work on mobile and desktop?
Yes. On mobile devices, the button opens the WhatsApp app. On desktops, it opens WhatsApp Web. This ensures your WhatsApp chat WooCommerce setup works smoothly across all platforms.
Can I include product information in the WhatsApp message?
Absolutely. You can pre-fill messages with dynamic content like product name or SKU. The Chat Help plugin supports this with dynamic tags, and developers can use PHP to generate messages programmatically.
Does adding WhatsApp chat slow down my WooCommerce store?
No. When implemented correctly—either manually or using a lightweight plugin like Chat Help—WhatsApp chat WooCommerce integration has minimal performance impact and can actually improve conversions by streamlining customer communication.


